Table of Contents
Formatting and positioning objects
During modeling in the Process designer , the modeling objects that are used can be changed in their appearance and positioning using various options. Formatting objects. To adjust the formatting of…

During modeling in the Process designer, the modeling objects that are used can be changed in their appearance and positioning using various options.
Formatting objects
Alternatively, a selection frame can be drawn around all objects to be formatted together in the Process Designer.
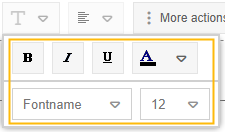
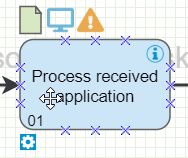
The formatting bar
The formatting bar in the upper area of the Process Designer contains general setting options.
The settings in the formatting bar can be applied to the following modeling objects:
- Process and Process group
- Task
- Sub-Process
- (Collapsed) Pool / Lane
- Start, Intermediate and End event
- Data object Input / Output
- Related document
- Adjacent process
- Text Annotation
- Connectors
- Rectangle
- Header and Footer
- All objects of the folder 'Drawing symbols'
The following actions are available (for a detailed description of some formatting options, see the section 'Formatting via the context menu'):

Actions fpr the process model / object | Formatting and alignment of the object |
|
|
Formatting via context menu
With a right click on an object, further formatting can be done in addition to the settings in the formatting bar.
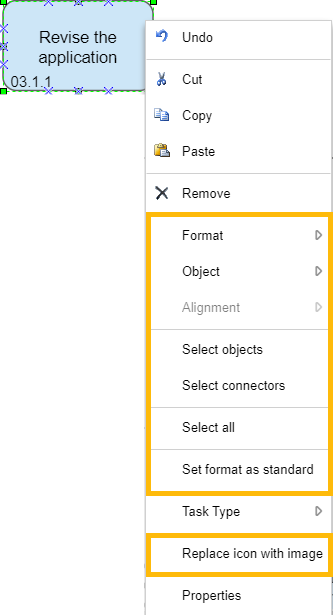
To select all connectors of a process model at once, click <Select connectors>.
To select all objects and connectors of a process model at once, click <Select all>.
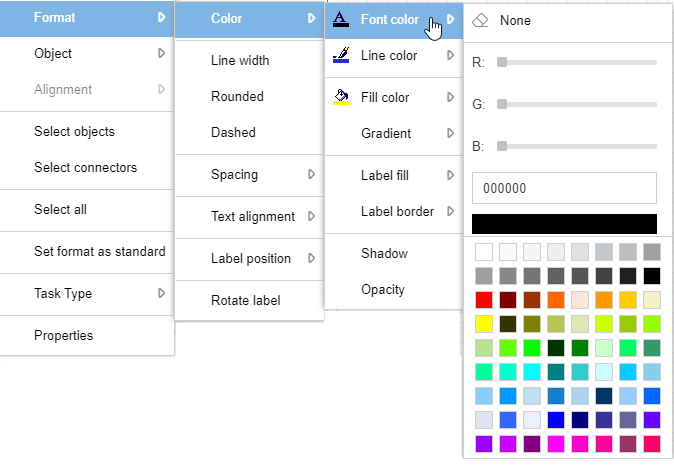
Formatting - Color
In the color settings, the fill color and border color of the object as well as the color of the object label can be adjusted using the following options:
General options for font color, line color & fill color |
|
Gradient | Here you select a 2nd fill color for the object and determine the direction in which a gradient from the 1st to the 2nd fill color should proceed (in the example a gradient from blue to green directed to the right)  |
Label fill & border | Independent of the fill color of the object, a separate fill color and border color for the object label can be defined here (in the example: green background and red border) 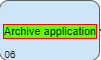 |
Shadow | Enables or disables a shadow that appears around the object. The size and orientation of the shadow cannot be adjusted |
Opacity | A percentage value can be specified, which determines the percentage to which the object is displayed transparent. |
Format - Further settings
Line width | Opens a window in which the width of the object border can be specified in pixels |
Rounded | Rectangular objects are displayed with rounded corners. Only affects the objects:
|
Dashed | The object border is displayed with a dashed line instead of a solid line. |
Spacing | The distance between the object and its label can be adjusted in 4 cardinal points. |
Text alignment & Label position | This can be used to determine the position of the text within the object (text alignment) or to display it in an area around the object (label position) |
Rotate label | The object label is rotated 90° counterclockwise. When selected again, the label is returned to its original position. |
Set standard for object format
When an object, e. g. a task, has been formatted, a right click and the selection <Set format as standard> can set a default format for all task objects application-wide. This has the following effect:
- Every existing task will be adapted to the newly defined standard format, unless the task was deliberately formatted differently (i.e. it still corresponded to the previous system standard)
- Every newly created task is created directly in the newly defined standard format
Replace icon with image
Using the button <Replace icon with image> you can replace the default icon of the object with any image in .JPG or .PNG file format.
Once you have inserted an image, you can switch back to the default SmartProcess icon by right-clicking again and clicking the button <Change to origin icon>.
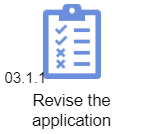
Standard icon | Icon replaced by image |
 |  |
If you have made any other formatting for color or alignment, it will no longer have any effect after being replaced by an image.
Therefore, if you reuse the object in other processes, the standard SmartProcess symbol is displayed first and you have to replace the icon manually again.
Moving, aligning and resizing objects
Via navigation in the process model
The objects can be moved via drag & drop.
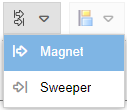
If the option is deactivated, objects can be moved normally using drag & drop.
However, if the option is activated, positioning the mouse exactly in the center of the object means "drag connector", so that the mouse must be placed slightly beside the center of the object to move it.
Drag connector:
Move object:
Once an object has been selected by mouse click, it can also be moved using the arrow keys on the keyboard. If several objects have been selected at the same time, they can also be moved via drag & drop or with the arrow keys.
If an object is moved via drag & drop, alignment lines help to position it as desired.
Once an object has been selected, it can be dragged larger or smaller using the mouse and the green squares. By holding down the <SHIFT> key, the aspect ratio of the object can be kept constant while increasing or decreasing the size.
Via context menu
With a right click on an object, various adjustments can be made via the list entry 'Object':
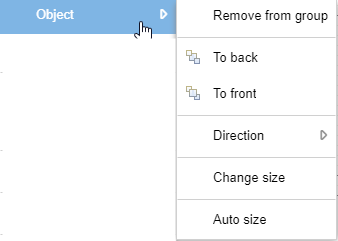
To back / To front | The selected object or objects are all displayed in the foreground or background of the process model. |
Direction | For some objects, the orientation can be changed so that the objects are rotated. These include:
|
Change size | A window appears, with which the dimensions of the object can be determined exactly in pixels. If several objects are selected simultaneously, the size of multiple objects can be changed simultaneously. |
Auto size | The size of the object is automatically adjusted depending on how much space the object label requires. This is a one-time action that must be performed again so that a recalculation takes place, for example, when the object label is changed. |
Alignment
If several objects have been selected in the process model, their position to each other can be harmonized via 'Alignment'.
Before | After |
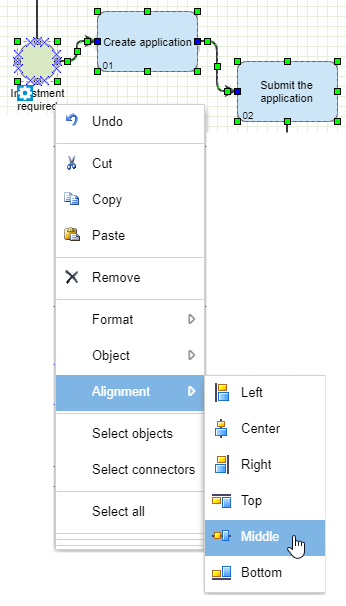 | 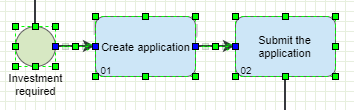 |
How did we do?
Create process groups & processes
Reuse & copy objects