Table of Contents
Word report designer for printouts (Additional module)
The Word Report Designer for printouts can be used to change the process description or to manage print templates with case content for workflows. To create new custom print templates, e.g., for self…

Table of Contents
The Word Report Designer for printouts can be used to change the process description or to manage print templates with case content for workflows.
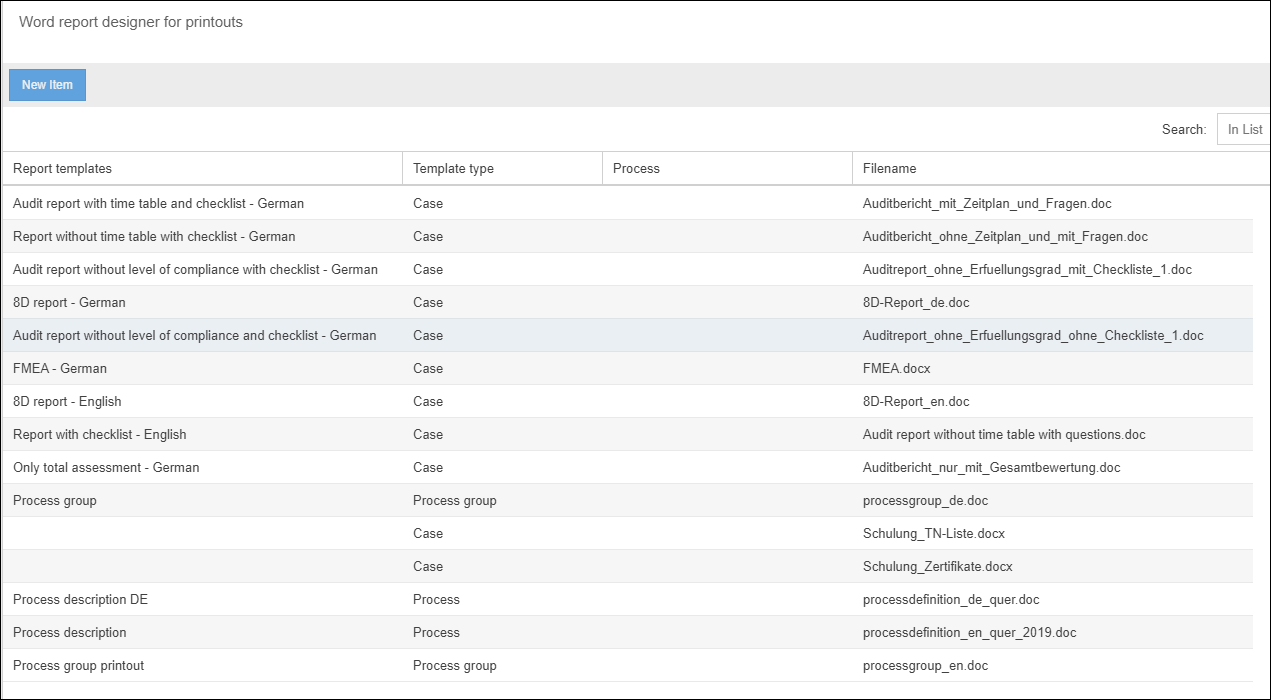
Create new report
With the button <New Item> you can create a new Word Report and store it for a specific object (process or case).
Report for processes/process groups | Report for cases |
 | 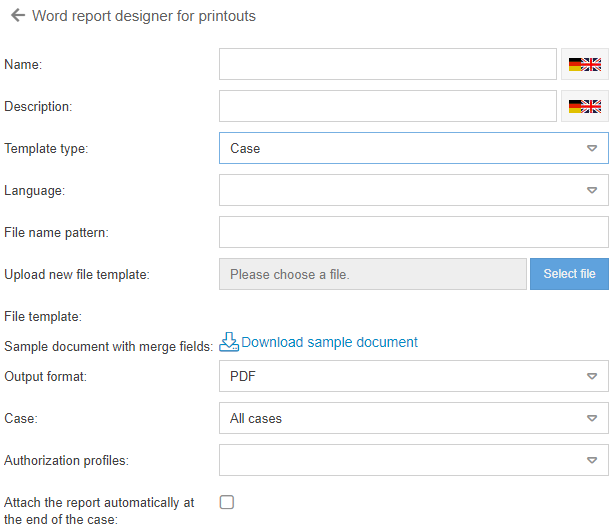 |
Field | Description |
Name | In this field the name of the template is defined. If SmartProcess is used in multiple languages, be sure to define the name in all other languages as well. |
Description | A description for the template must be entered in this field. |
Template type | The template type can be used to determine whether a template is to be created for a case, a process, a process group or a text module. The template types "Case" and "Text module" are only available if the optional module "Word Report Designer" has been purchased and activated in the system. |
Language | This field is used to define the language of the application in which the template should be available. In this field, only those languages are available that can be set as application languages. |
Default Selection | It is possible to store several process descriptions for processes. With this option a description can be defined as default. |
File template | If an existing template is opened, this field shows the currently stored file template.  Click on the file name to download the currently saved template. |
Sample document with merge fields |  For more information, see the next section. |
File name pattern | A file name pattern can only be assigned in Word Reports for cases. A file name pattern can be defined in this field. This will be displayed when the word report is downloaded in the case window. All placeholders of the selected case can be used in this field. Example for file name pattern: Report for action <Processnumber> When the report is called up and saved from from the "Reports and prints" window, the file name is suggested according to the file name pattern. 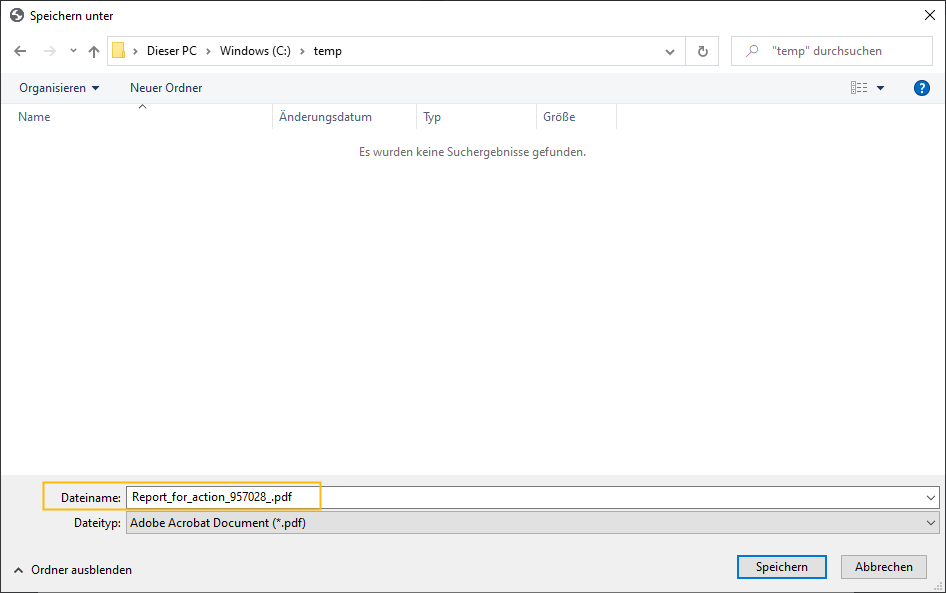 |
Upload new file template | Use this field to upload a new file template. |
Output format | In this field you can specify the task format for reports. The available formats are .docx and .pdf. |
Case | In this field you have to specify for which case the report should be available in the case window. Based on the selected task, the button <Download example document with merge fields> offers a document that contains all placeholders for the selected case type. |
Authorization profiles | This field can be used to restrict which authorization profile has access to this report in the case window. |
Attach the report automatically at the end of the case | If this option is selected, the report is automatically attached to the case as a file attachment when the case is closed. |
Example document with merge fields
With the button <Download example document with merge fields> a Word document can be downloaded for cases, which contains all placeholders available in the case. This document can be customized in Word and uploaded again as a file template.
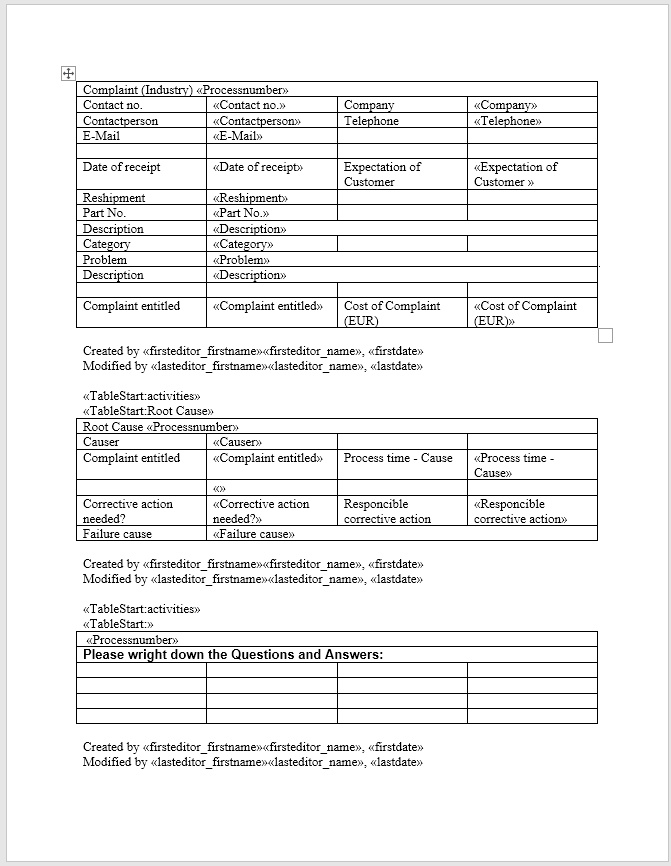
For processes, the standard process description is available for download as an example document.
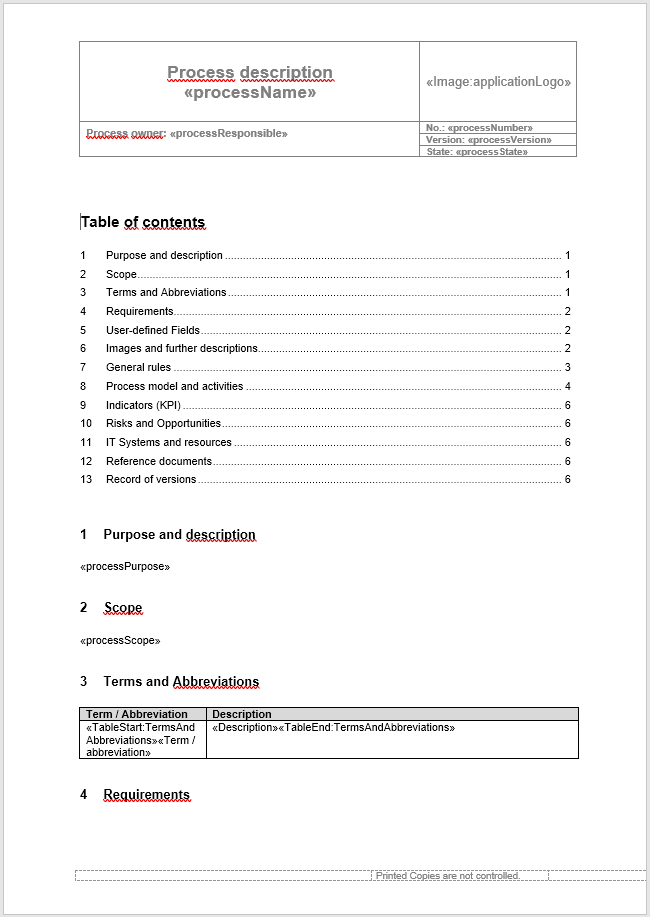
Use placeholders in Word files
The placeholders are inserted in Microsoft Word as fields of type Mergefield. How you can create this field depends on your version of Word.
Insert of a newplaceholder
- Place the cursor at the position in the file where the new Mergefield should be inserted.
- Chose Insert from the menu and navigate to the the sub menu Quick Parts to select Field.
- From the list on the left choose MergeField and add the name of the placeholder in the field Field name on the right.
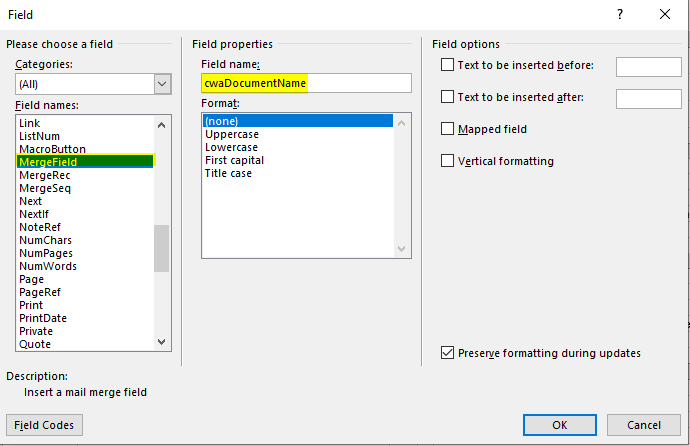
- Confirm with <OK> to add the MergeField.
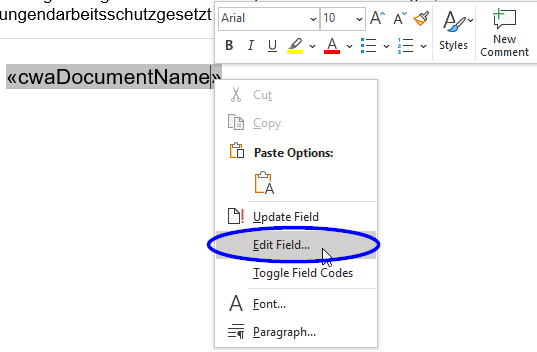
If you want to output a different content at the position later, you can adjust the properties of the mergefield.
Instead, right-click on the mergefield and open the properties window of the mergefield again via <Edit field>. At this point you can now adjust the field name or check for errors.
Placeholder lists
How did we do?
Manage maintenance access (only for SaaS systems)
Audit Trail
